Starlink Whitelist: How to Properly Register Your Terminal via ASC or Diia, Step-by-Step Guide
Kyiv • UNN
Ukraine is introducing a whitelist regime for Starlink terminals to ensure connectivity for civilians and businesses, while blocking it for the enemy. Owners must verify their terminal once through an Administrative Service Center (ASC) or Diia.

Ukraine is implementing a whitelist regime for Starlink terminals to ensure that communication works for civilians and businesses but is unavailable to the enemy. For this, owners need to verify their terminal once. UNN will tell you more about how to do this step-by-step and simply.
A whitelist is a list of verified Starlink terminals. Unverified devices may be disconnected later. The Starlink registration procedure is free and mandatory for individuals, sole proprietors, and businesses. A separate secure algorithm applies to the Defense Forces, so this instruction does not concern them, the Ministry of Digital Transformation of Ukraine states.
The service has been available since February 3 in ASCs for individuals and sole proprietors, and through the Diia portal for legal entities.
What to prepare in advance
Before registering, find your Starlink data. You will need it regardless of the submission method:
- KIT- is a unique terminal identifier located in the settings of the official Starlink application (requires Wi-Fi connection);
- UTID (Target ID) or Dish ID - antenna identifier; - user account number on the Starlink portal (if available).
Important: to find the UTID (Target ID) without connecting Starlink to the Internet, use the following instructions:
1. Open the Starlink application.
2. In the bottom corner, click the "Information" (i) button.
3. Find the item Target ID / Target Identifier – this is the required UTID.
How to register Starlink in the ASC (for individuals and sole proprietors)
You can contact any ASC.
Step 1. Prepare documents
Bring with you:
- passport (ID card or booklet);
- RNOKPP (identification code).
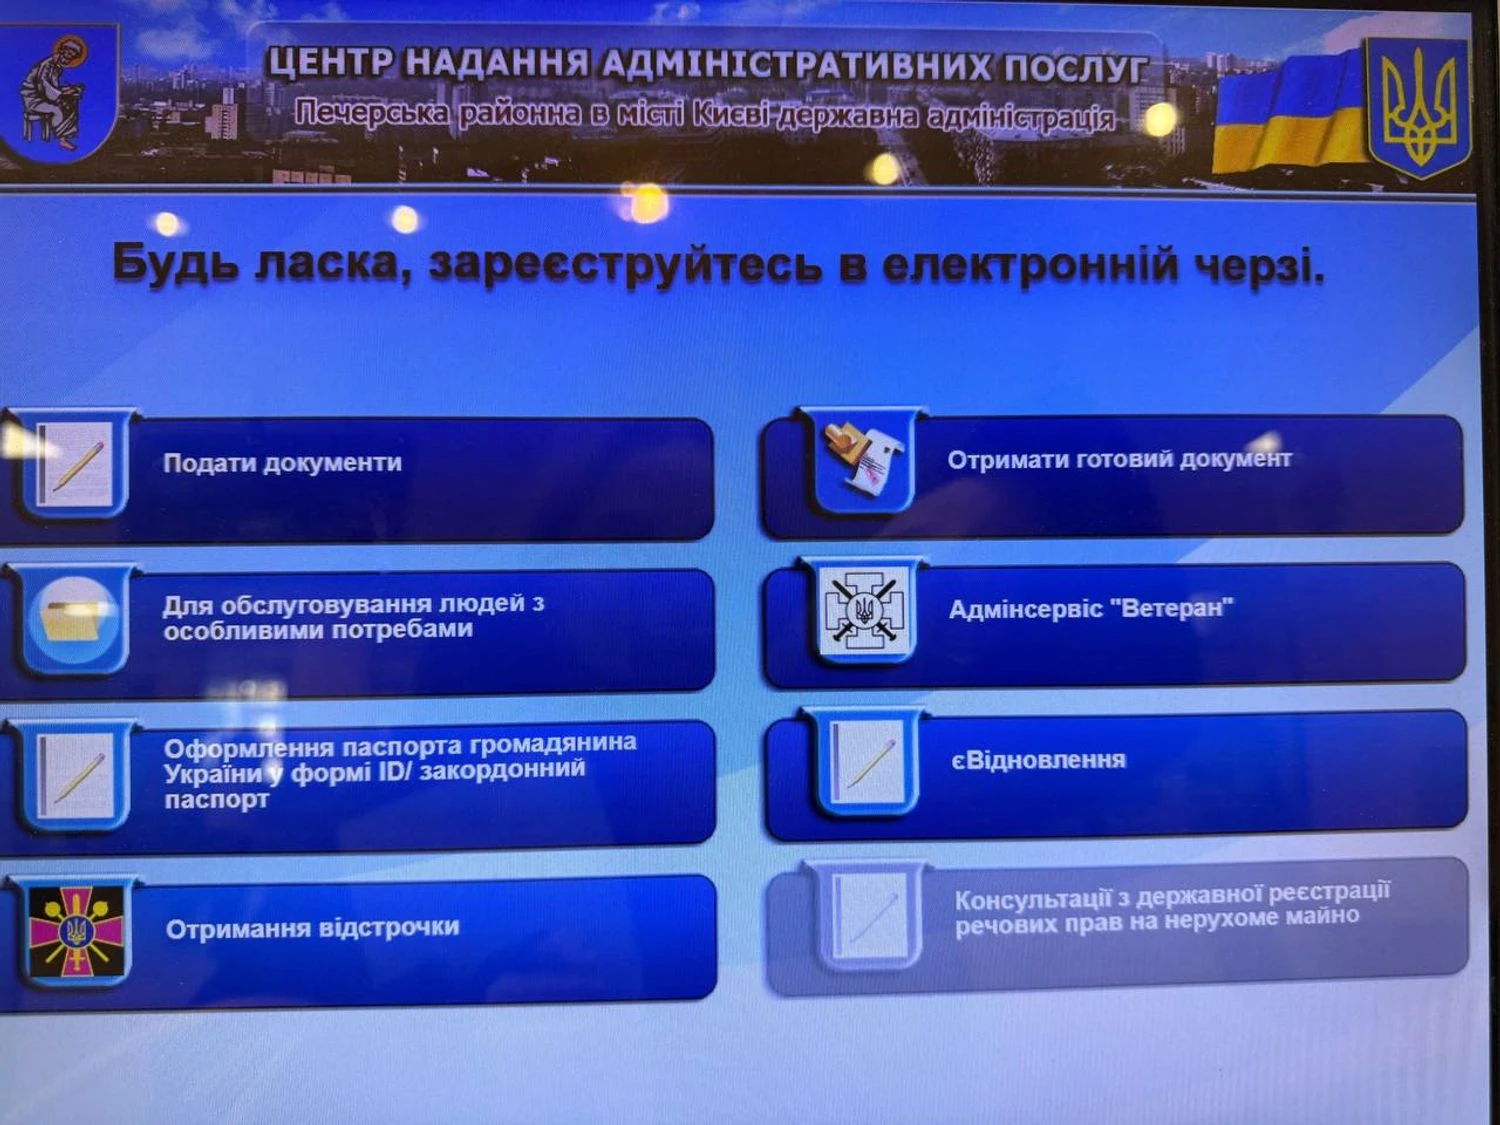
Step 2. Register in the electronic queue:
- enter the ASC and approach the electronic board.
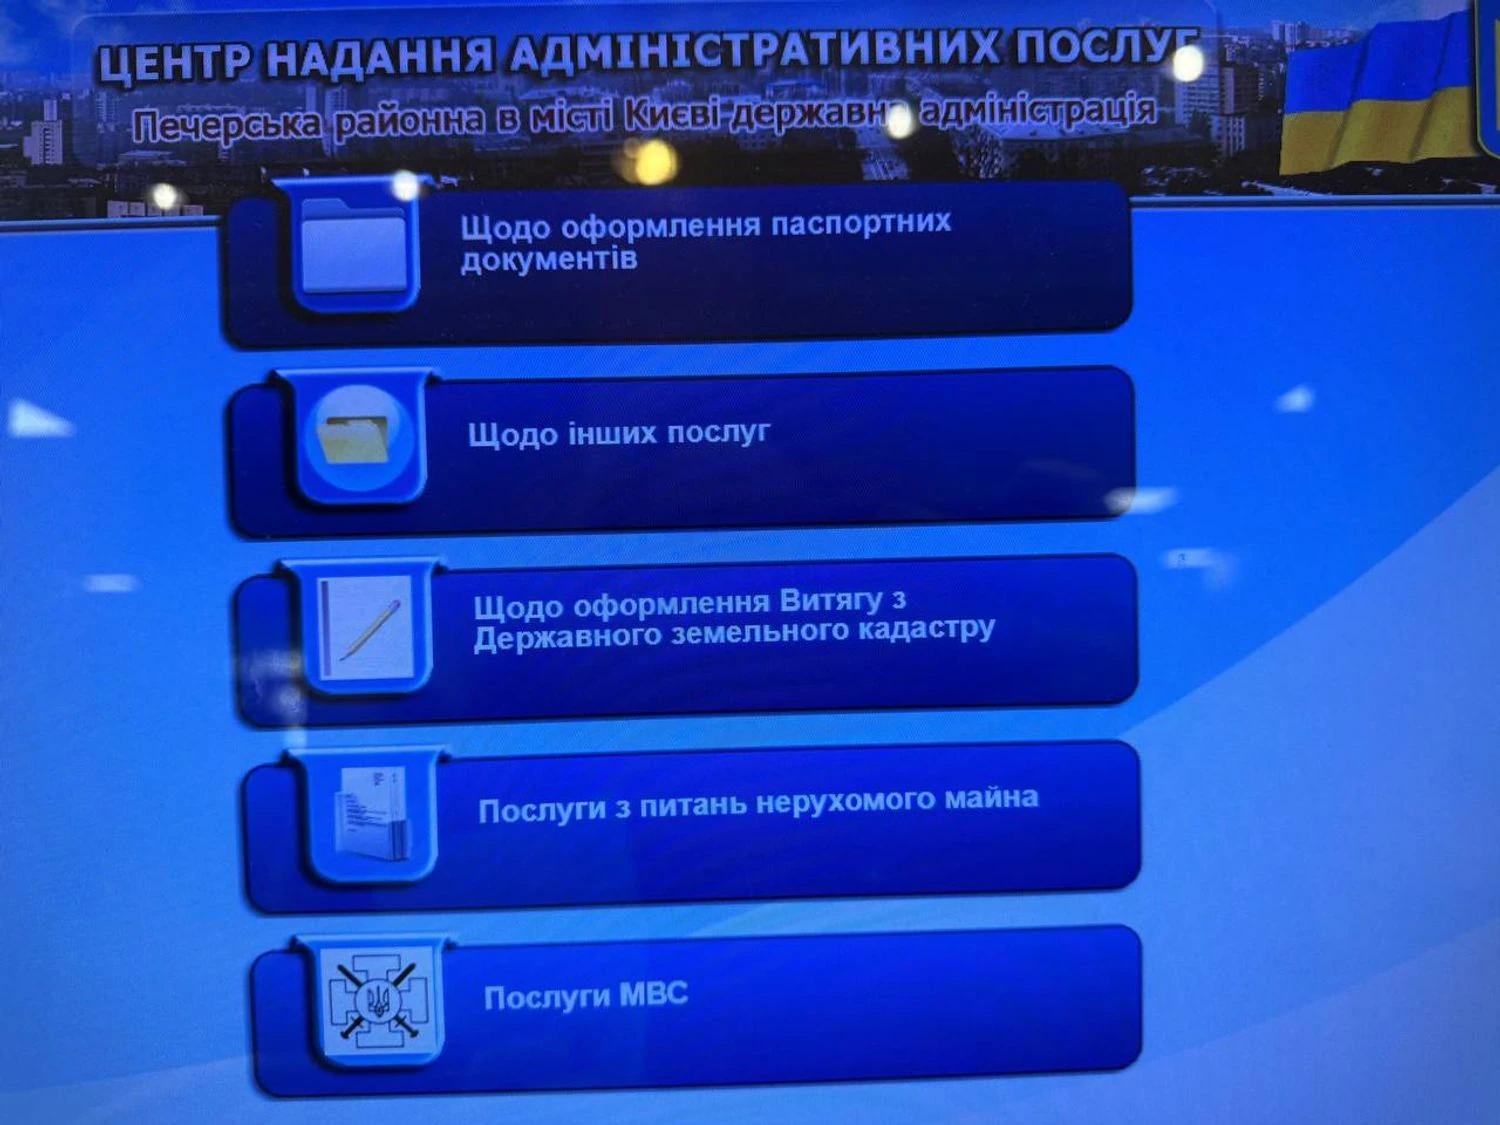
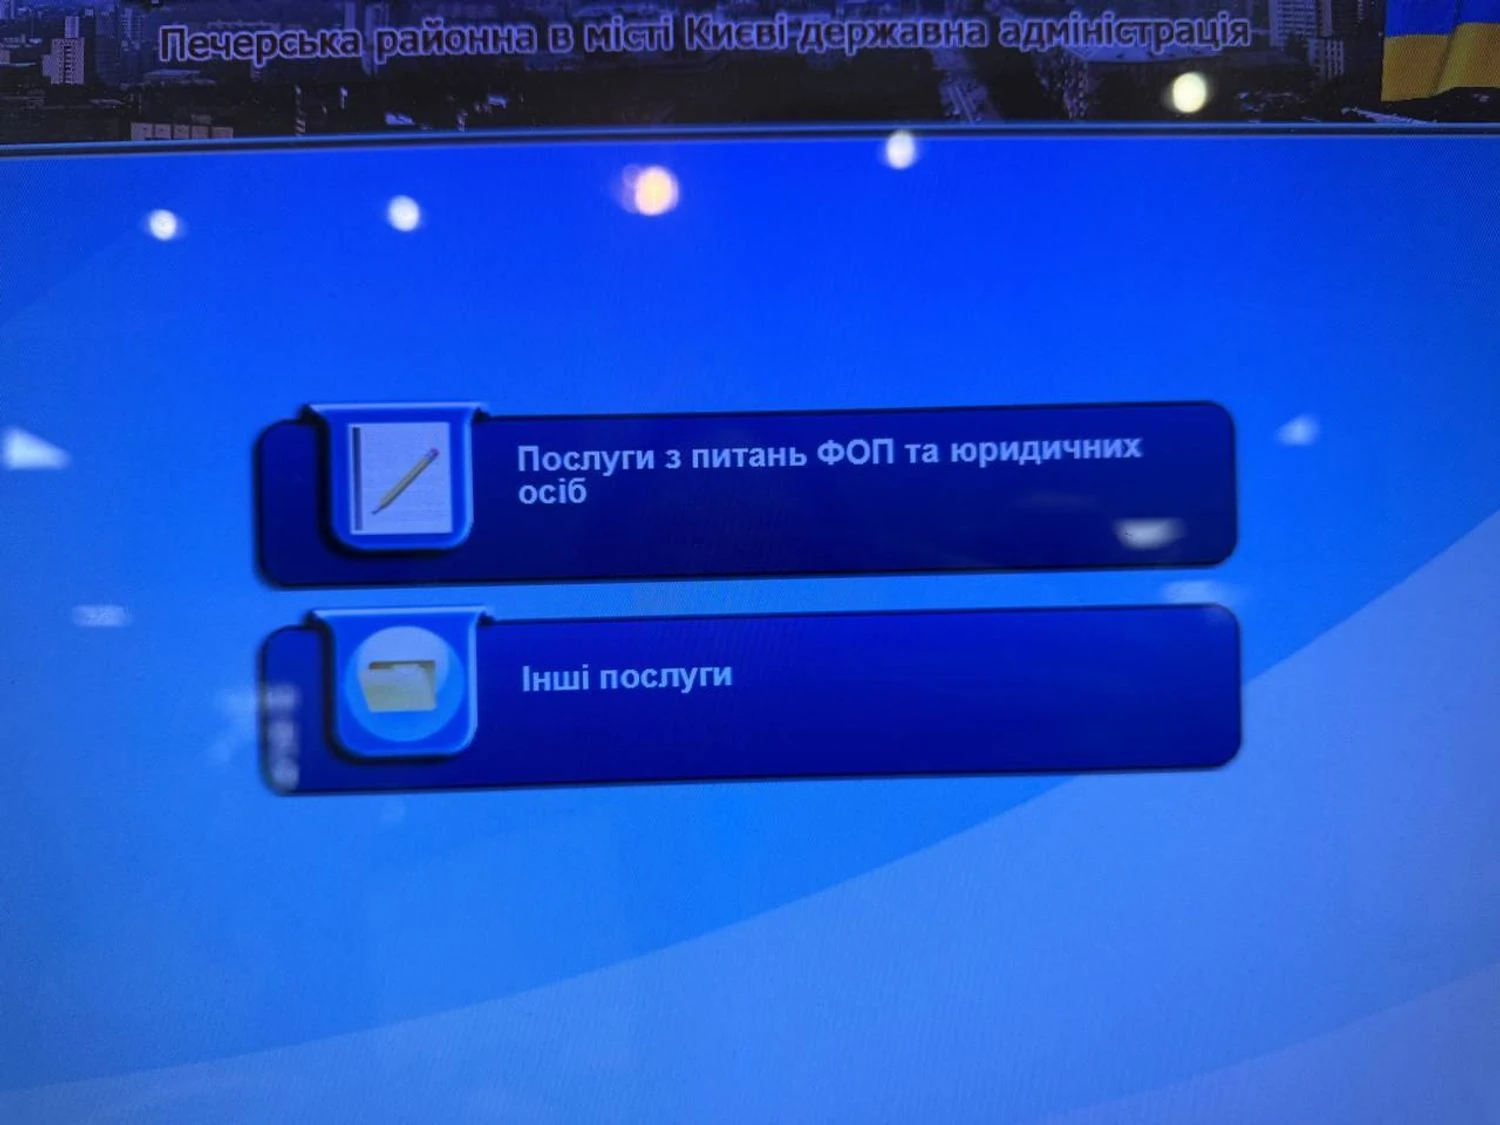
- click "Submit documents".
- select "Regarding other services".
- then - "Other services".
- get a ticket and wait for the inspector's call.
Step 3. Submit an application
Inform the administrator that you want to add the Starlink terminal to the whitelist. The ASC employee will check the documents, accept the terminal data, and process the application.
After this, your Starlink will be whitelisted and will work without restrictions.
Limits for individuals and sole proprietors:
- 1 terminal without physical presence of the device;
- up to 3 terminals with physical display of equipment.
How to register Starlink via Diia (for businesses)
For legal entities, the procedure is completely online.
What is needed:
- KIT number (if available);
- UTID (Target ID) or Dish ID;
- account number in the Starlink application;
- QES of a legal entity.
Step-by-step:
1. Go to the Diia Portal and log in using the QES of a legal entity.
2. Find the service "Notification of the use of Starlink terminals".
3. Company data will be automatically retrieved, and you will manually enter information about the terminals and the public account number.
4. Check the application and sign it with a QES.
5. The application is automatically transferred to the Ministry of Digital Transformation.
Limits for businesses:
- up to 10 terminals - for ordinary legal entities;
- unlimited - for enterprises with critical status.
Why it matters
Whitelist is not bureaucracy, but an element of security. This procedure allows Ukraine to control the operation of satellite communications during the war and prevent its use by the enemy.